I started the dash reshaping back in 2006 and the current is my version 5.0
It all started from the need of adding some extra gauges. The first ones were the voltmeter and ammeter. Those were easy to install in the sides of the existing panel.
 |
| This was my cockpit version 1. I had the voltmeter on the left and ammeter on the right side. The tank bag was by BMW. |
When I purchased the tire pressure monitoring system form SmarTire the only place for the display was on the left side under my voltmeter. After installiing I realized it did not work because the display was too far off from the direct line of sight. The LCD display was totally unreadable so it needed to be mounted in the center of the dash. So I started planning an extension to the piece that is right under the windshield.
 |
| Here is my version nr 2 being prepared. I had already covered the "mistake" hole under the voltmeter as well as the dash light opening since I planned to replace that with some leds. There is one dash fastening screw hidden behind the original dash light. This I removed right away and have never missed it since... |
 |
| Here is the start of reshaping the upper part. The opening in the center was for the tail of the quite long SmarTire display unit. |
 |
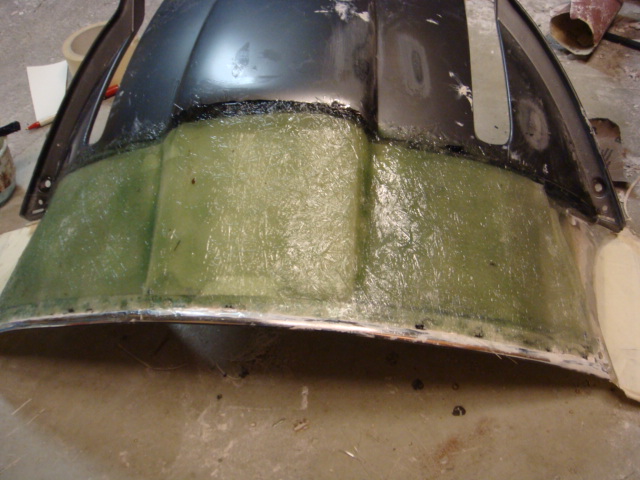
| I used galvanized tight wire mesh which was quite easy to shape. On top of this I laminated fiberglass. |
 |
| Fiberglass and putty added in order to maintain the "hump" of the center part. |
 |
| It takes a lot of sanding and reapplying the putty... |
 |
| But here it is ready painted. |
 |
| And here is my cockpit version 2 ready. There is a radar detector fastened with Velcro on top. This was only used outside Finland as here it gets confiscated by the police plus a fine based on your income is applied. |
 |
| The same with the led lights. |
The version # 2 served me about a year until I needed some more gauges, engine oil and final drive oil temperature, and I had no place to install them.
 |
| I started planning my version # 3 from a fresh upper panel which I purchased from somewhere. This time I did not use the wire mesh any more bu instead I used the standard perforated duct installation steel band. Note how the ends of the band were fastened in the wind deflectors since they were going to be integrated the same way as in my previous version. |
 |
| For shaping the front part I used some stiff cardboard. |
 |
| I started shaping the underside of the new dash at first. I used thinner stripes of cardboard and masking tape in order to make the contours making sure that my steel tape was visible on the edge so there was a surface for the fiberglass resin to fasten. |
 |
| Laminating of the fibergalss was done. Next putty was needed. |
 |
| Here putty was added and sanding was about done and the outline of the access hatch was drawn. It is important to leave access opening that you can connect your gauges, switches etc and the hatch is best to do in the underside of the new dash. |
 |
| I used a hacksaw blade to cut the hatch. |
 |
| The hatch needs to be fastened properly. Here I laminated a total of six nuts but in my later versions I went down to four screws only. Note that the top side of the dash is still missing, that can only be made after the hatch is ready in the underside. |
 |
| This is how the underside hatch and the led lights look like. |
 |
| Here the topside has been laminated already. |
 |
| And this is what you need the hatch for! |
 |
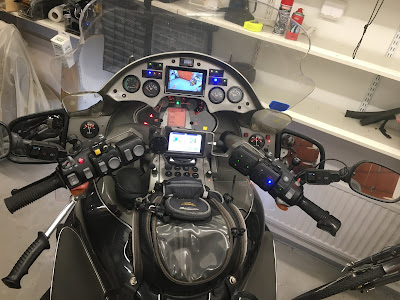
| And here is my cockpit # 3 ready. I was able to fit the both oil temperature gauges, manifold vacuum gauge and the SmarTire display together with some switches in this dash. I later had to change the oil temperature gauges as the scale in my original ones reached up to 150 deg C which was too high. The current ones (by VDO) reach to 100 C and those are ok. |
I was happy with this cockpit version for a year until I realized that I need some more switches since more gadgets were added on the bike elsewhere. I also wanted to add lighting in the transparent wind deflectors.
 |
| Here I drilled holes in the deflectors. |
 |
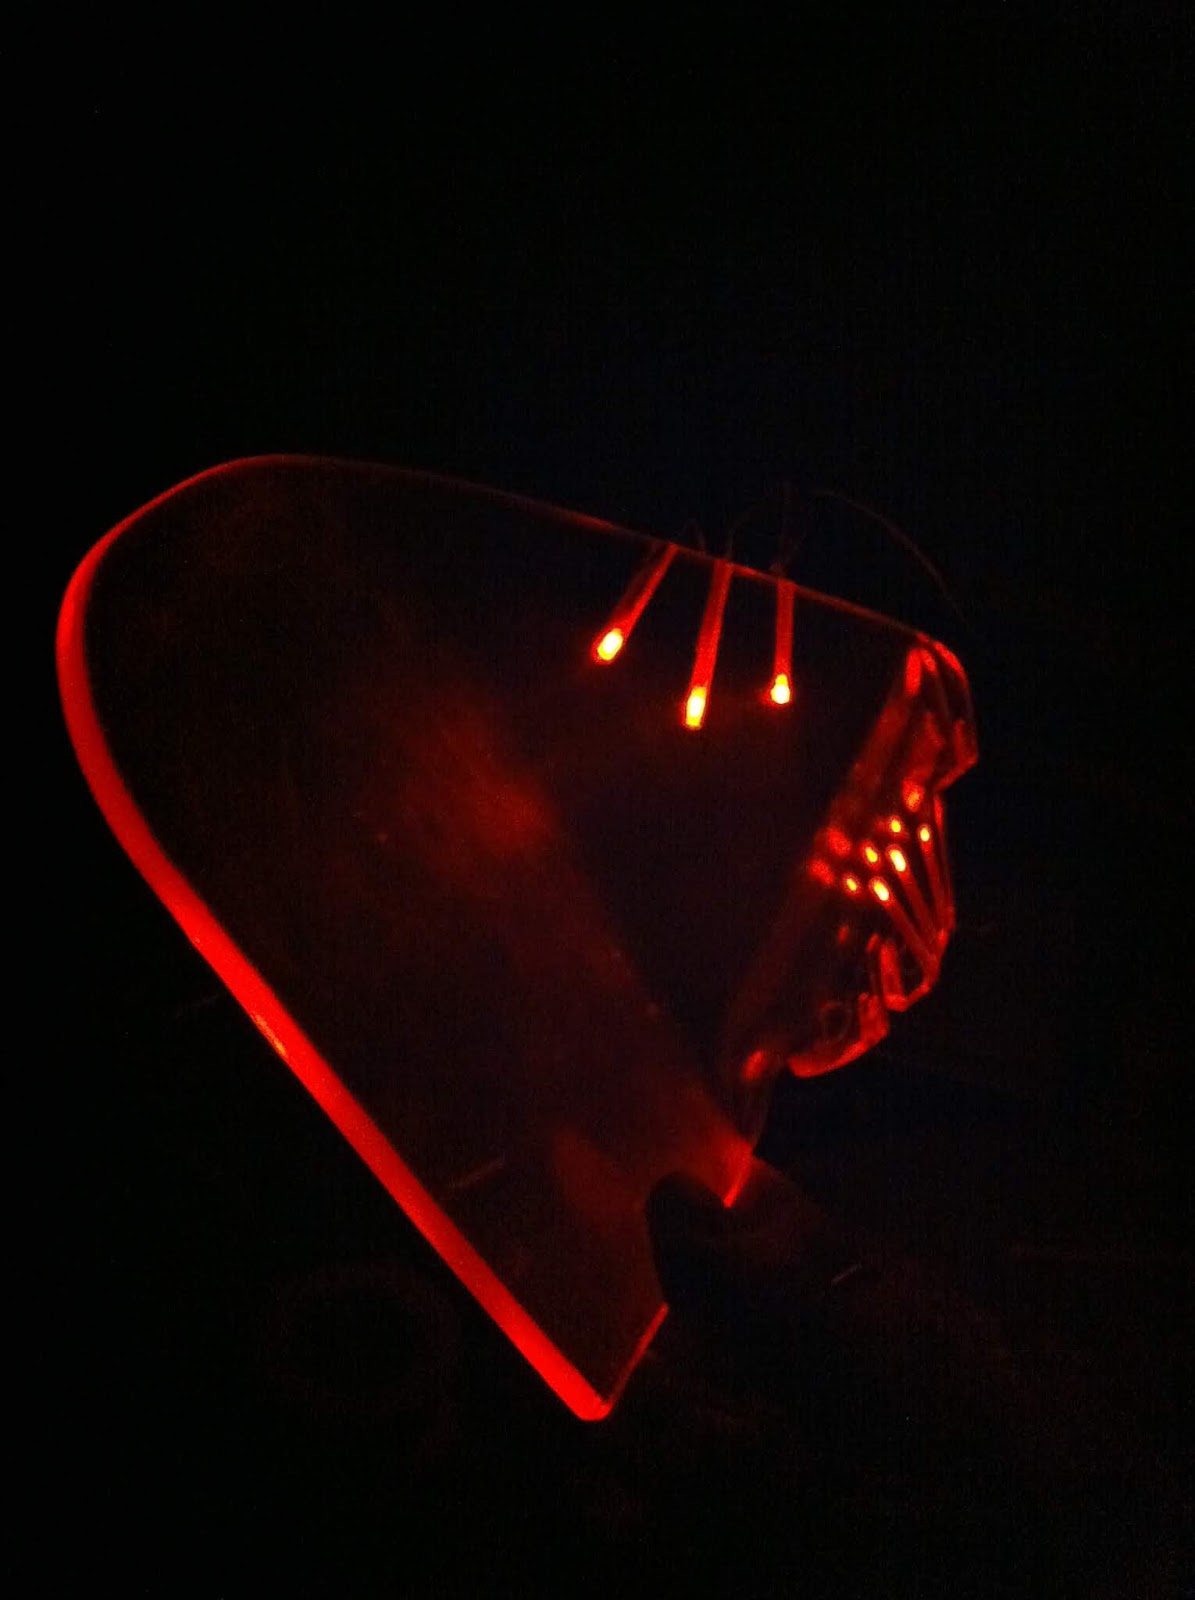
| These were the orange leds that went inside the deflectors. |
 |
| This is what lit looks like when lighted up. I also sanded the edge of the deflectors with #500 grid wet sandpaper. |
 |
| One more detail of how to insert the end of the steel band in the defelctor. |
 |
| Here the upper part was being shaped. |
 |
| The front panel of corrugated board waiting for the fiberglass. |
 |
| I call this my version 3.5 as it is pretty much the same as the previous one except more switches. |
The version 3.5 served me from 2009 until 2012 until I got an inspiration of the oil pressure gauge and a display that would act as a monitor for my onborad cameras.
 |
| The upper dash got bigger in each version. The manufacturing process for my version 4 was the same as decribed before. |
 |
| The base for making this one I got from another LT rider who took my previous version and he gave me his stock piece to start from. In this picture I was already planning the version #5 since the screen I had in version 4 was too small and I was not completetly happy with the installation of it. I made the version 5 from this version 4 simply by redoing the face part as well as the underside. |
So I found from somewhere in the Internet (probably China) a larger screen that came together with a reversing camera. Of course these cameras are not intended for weatherproof installation. The compartment inside my upper dash remains dry so I only had to seal the edges of the screen with black silicone and I also applied a screen protector on the screen and it has worked for a couple of years so far.
Looks like version 6 is still on the row because my long serving SmarTire tire pressure monitoring system has died out. The batteries in the pressure sensors inside the tires are dead after 15 years and some 180.000 km and the sensors are not made serviceable. Plus SmarTire has discontinued their motorcycle set altogether.
So I have ordered a new system which is still on the way to Finland and I need to remove the SmarTire display and replace it with the new one...


Very Very well done sir !!!!Genius !!!!
ReplyDeleteHello , I was just wondering had you started Version 6 yet ?
DeleteHello there, I am pretty happy with my present version. The problem being that I cannot figure out any more instruments to install in the dash. Well, it might be that I need to change my SmaTire tire pressure sensor display unit in the coming winter but that is such a small job that I don’t need to redo the whole dash. Thanks for your interest!
Delete