OK guys, this is by no means my invention. The same instructions were found at the BMWLT.com forum already years ago but as it looks now at least some of the photos are lost and as I was recently asked about this modification by a fellow LT rider as he could not find it in internet so I figured I will add it here...
The modification concerns modifying the gas tank cap in such way that you don't necessarily need the ignition key every time you are filling the tank. Sometimes it is very irritating to first lock your handlebars and then take the ignition key off simply for a gas fill. You can still lock the cap as before but also leave it unlocked.
So here is the way I was taught to do it:
 |
| You start the work by removing the gas cap cover. You can do it with the help of a small screwdriver. |
 |
| Under the lid and lock cylinder there is a small spring, do not loose it! |
 |
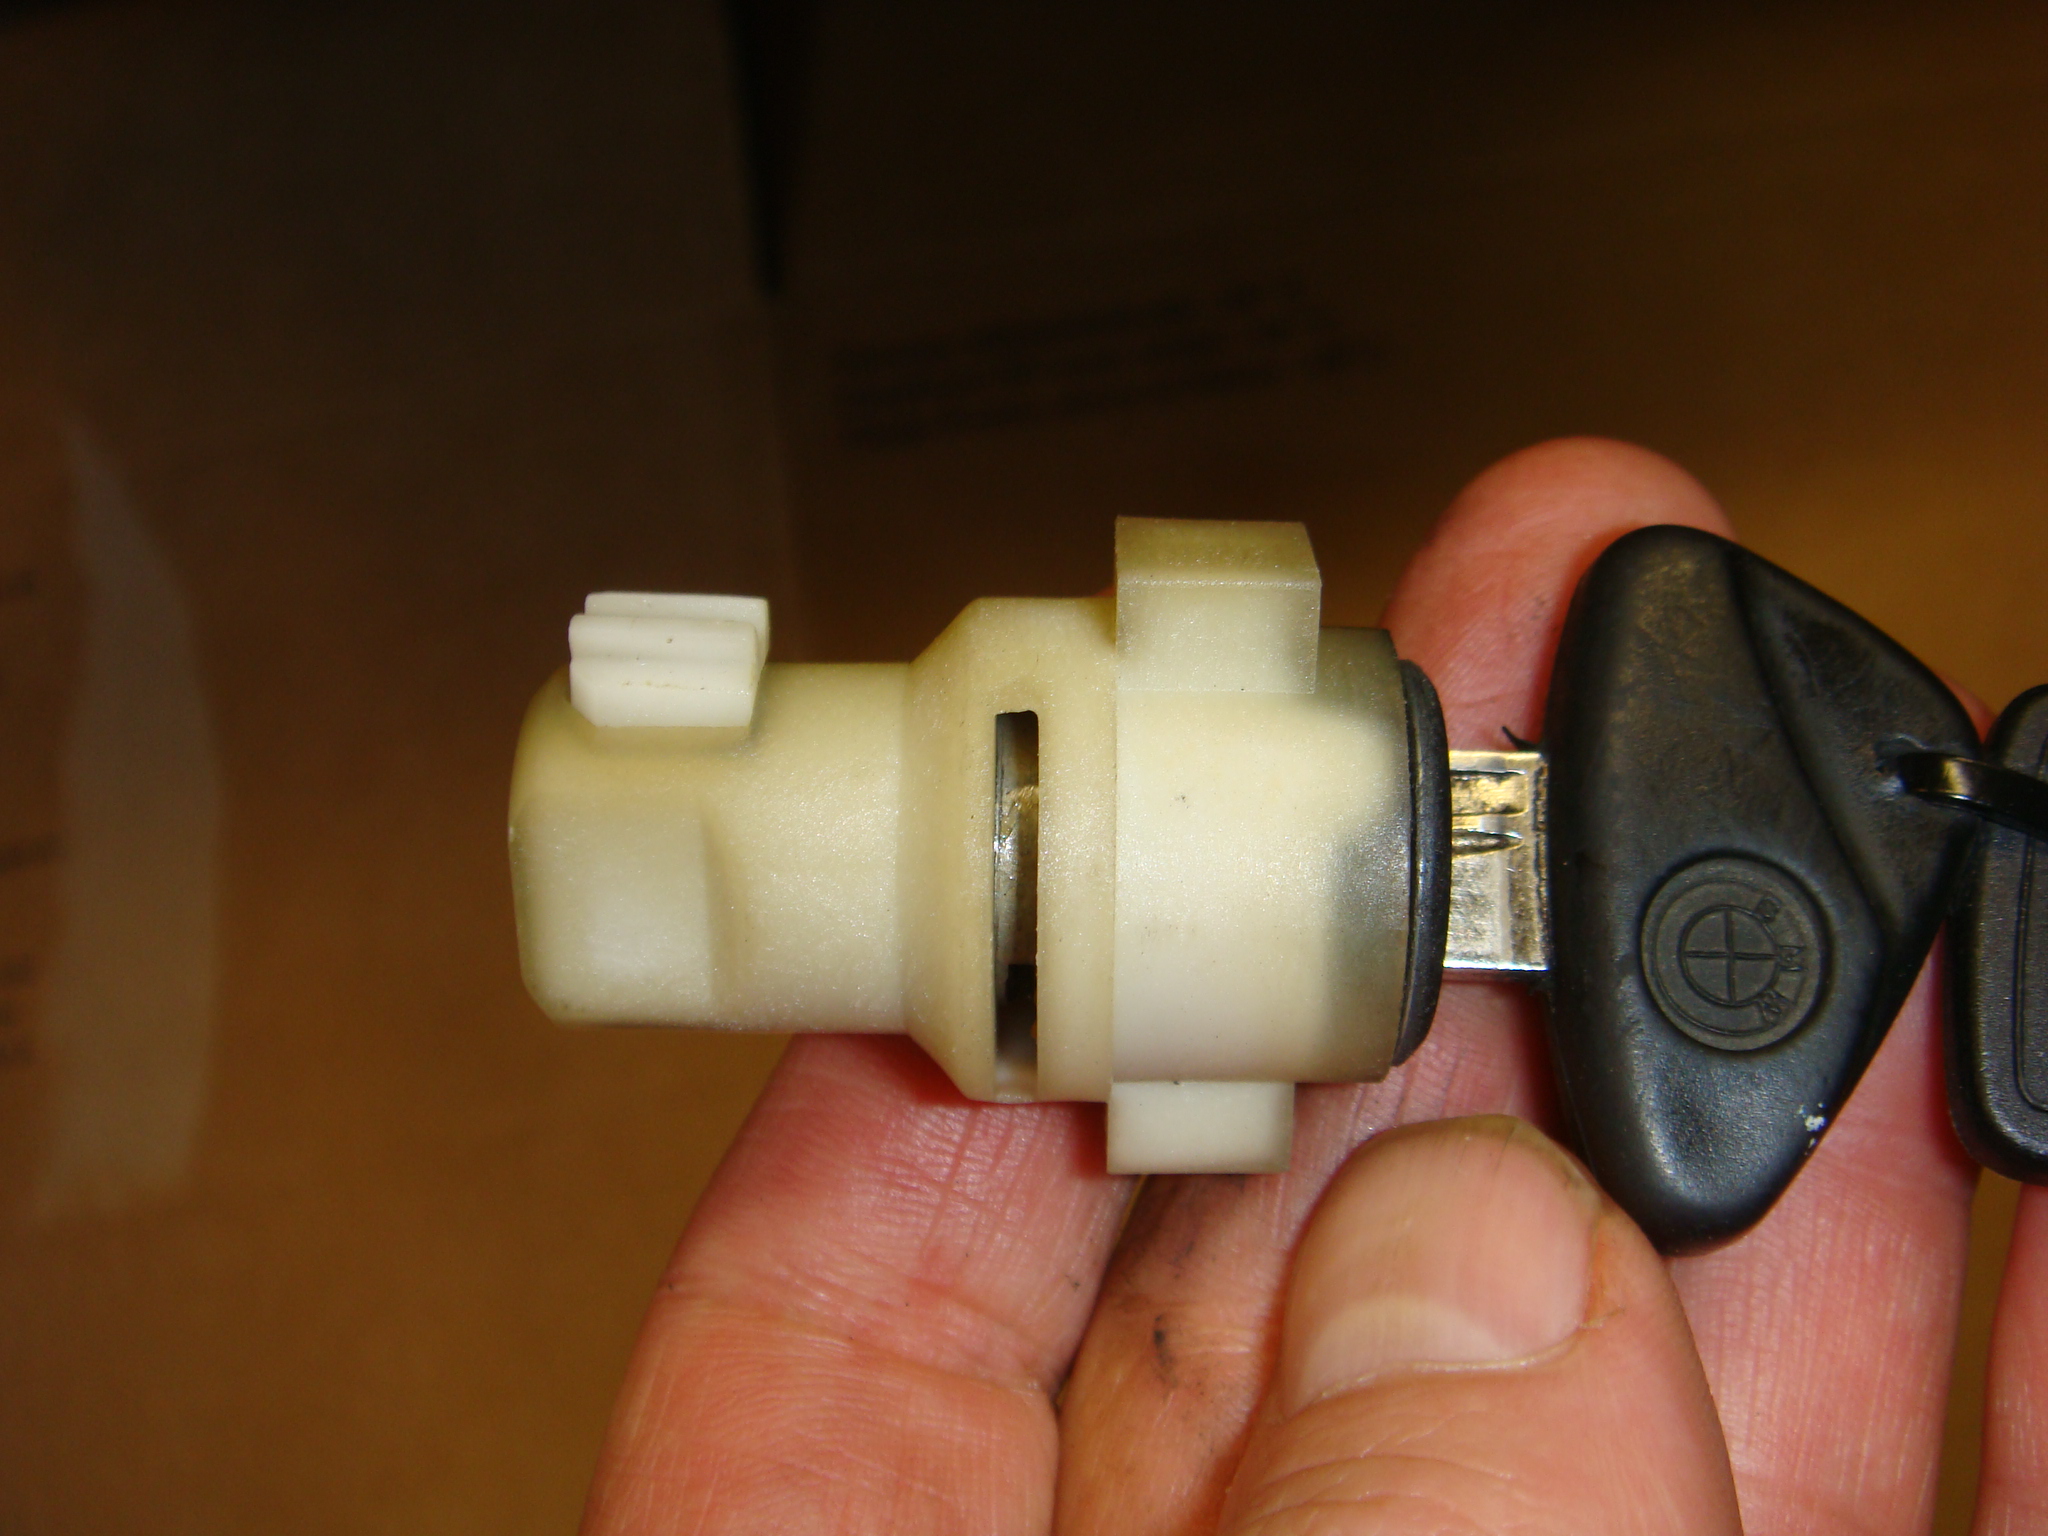
| Now you can remove the lock cylinder simply by lifting it out. |
 |
| When you turn the key in the lock cylinder you can see the pin at the end of the cylinder go up and down. When the pin is up, you can open the gas cap. When it is down the cap just rotates and will not open. Normally the key comes out of the cylinder only when the pin is down. Our target is to modify the lock cylinder in such way that the key can come out in both pin positions. |
 |
| Now turn the key in the cylinder so that the pin is in down position. Then wrap some tape around the pin to keep it in place as next we are going to take the lock cylinder in two parts. Look closer at the lower part of the cavity in the picture, there is a small metallic pin in the lower part of it. Push it in with a small screwdriver, drill bit or whatever fits in the cavity. |
 |
After you have pushed the little pin in you can pull the inner part (and the key) out from the cylinder. NOTE: keep the tape still around the cylinder although in this picture it is already removed. Also it is best you keep the key in the cylinder all the time.
 | | The black "shelf" in the picture is the one that needs to be ground shorter.Make sure you shorten it from the direction of the arrow. |
|
 |
I used a Vise-grip to hold the the lock cylinder as it tends to get hot during grinding. Grind off about 60-70 % of the shelf.
|
 |
| I also ground some plastic off the plastic outer cylinder. |
The idea of the whole procedure is to grind enough material off both parts so that you can turn the key a full 180 degrees so that it can come out in both positions. Some people grind only from the plastic part in order to achieve the same result. You can do either way. Push in the key cylinder into the plastic once and test if the key turns enough, if not continue the grinding.
 |
| Here I was doing the grinding with a Dremel. |
 |
| The final result is this. The plastic pin is out and the ignition key can be pulled out. Next simply reassemble you gas cap and now you can choose to lock it or leave unlocked. |